When I first started teaching, I was given a textbook that included homework problems and an answer key. I thought, this will be so easy! Little did I know the challenges that awaited me when it came to checking homework assignments. What Didn't Work: I'd teach a lesson, assign homework, and then spend the next day reading off the answers to my students so they could mark which were incorrect. However, two major roadblocks stood in the way of this seemingly straightforward process:
What Does Work: The first thing I realized was that my students need to SEE step-by-step how each problem was solved. This simple shift had several benefits:
Implementing the Method: To streamline this process, I introduced a rule: no red pens or markers during homework. This way, when it's time to check assignments, students can grab a red pen or marker, strike through wrong answers, and jot down their missteps. I grade based on completion because learning from mistakes is all part of the math process. Checking for Homework Completion: To avoid taking up instructional time, consider these options:
In Conclusion: By embracing these changes, the classroom dynamic shifted. Valuable time was saved, immediate feedback was provided, and mistakes became stepping stones to success. Projecting solutions on the board transformed the learning experience, making it engaging and interactive. This method has also made it easier for me to manage grading, ensuring timely feedback and a more productive use of class time. Give these tips a try, and watch how your classroom efficiency improves!
6 Comments
WHY have students work with a partner? Just like everyone wants a best friend, because life is better when it's shared with someone else, most students want to work with a partner in math class. And there are many benefits to working together:
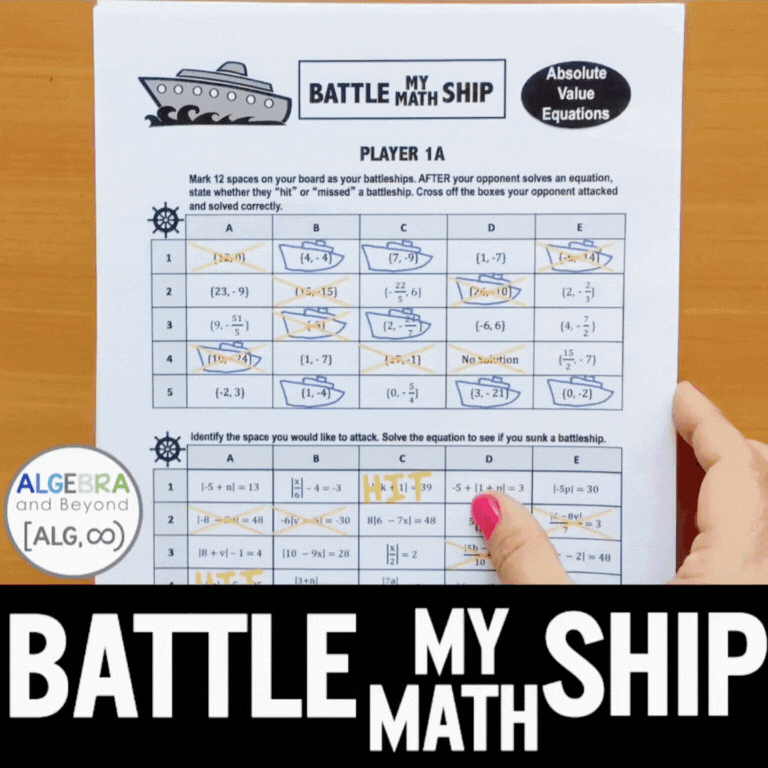
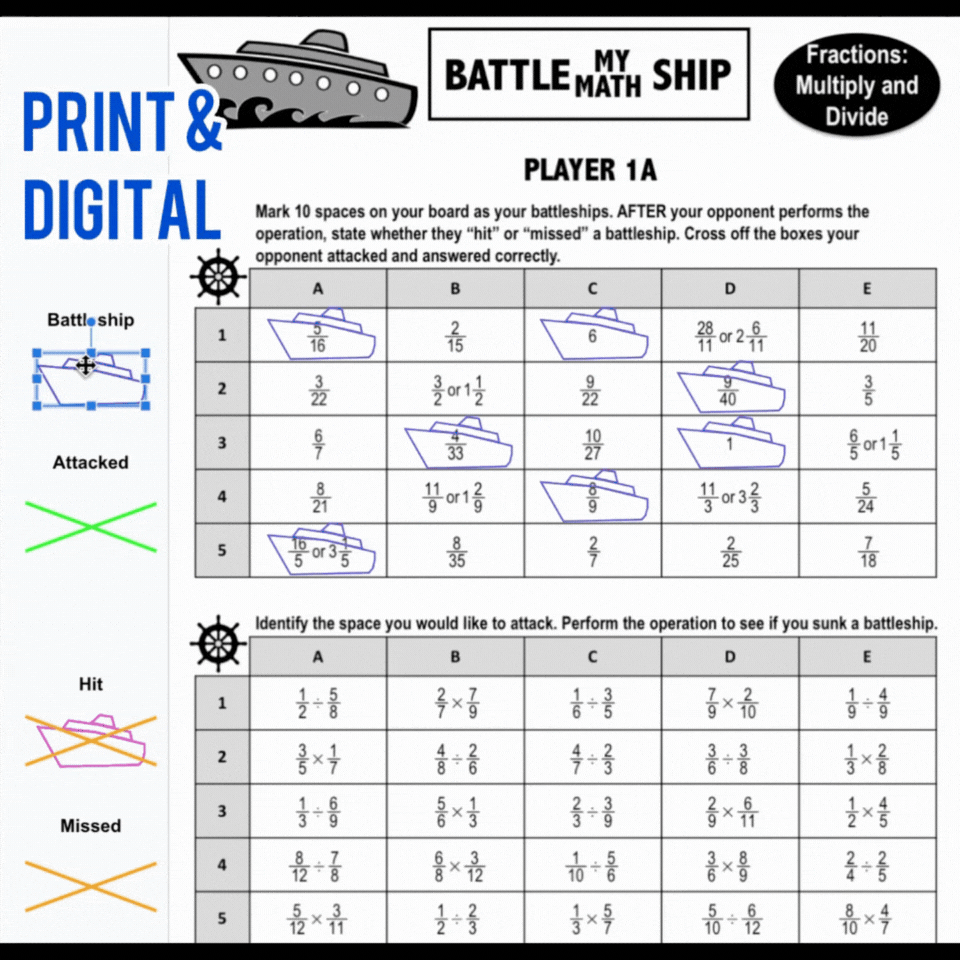
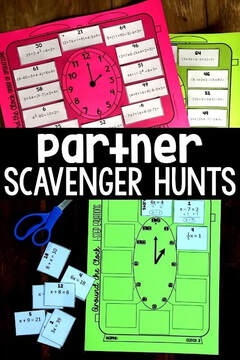
And on top of all the above, students are going to level up their understanding of math! And, let's face it, that's the main goal! HOW can students work in pairs? Of course, if you were to ask students about their ideal way of teaming up, you’d probably get responses like, "I'll do the odd-numbered problems, and my partner can do the even ones." BUT, that’s NOT at all the approach I have in mind for working in pairs. You need carefully crafted activities that are set up for students to team up and tackle their own challenges. Well, you’re in luck! I have a few activities that meet this criteria. Each of them will help improve your students' math skills! #1 My ever popular Battle My Math Ship Games! IMO this is THE BEST PARTNER ACTIVITY ever! Students take turns attacking spaces and sinking ships, just like the original game of Battleship. You can print and go or have your students play digitally. Over 100 different math concepts to choose from, so you can find the exact review for your students. Perfect to enhance engagement and reduce math anxiety! Educator's Review: If you aren't using the Battle My Math Ship resources yet...you are ABSOLUTELY missing out. The students love the game - and it evens the playing field a bit for struggling students as there is a little luck involved. My students wish there was math battleship for every topic they study. Zero prep (make a copy) and go. – Allyson B. Learn more about this game and find out what educators are saying HERE.
#2 Take the hassle out of checking math problems with these Partner Check review activities. These user-friendly, printable worksheets are designed to promote independent learning, reinforce math skills, and give students instant feedback. Perfect for building confidence and sharing different perspectives! You can learn more about these dynamic activities HERE. What educators are saying about these activities... Wow! My students were so engaged. Each wanted to be the first to get them all right. I love the way they excitedly continued to the end, celebrating each success with fist pumps and "I rocked this!" Thanks for a great resource. – Jeana H. I really enjoyed using this activity with my students. I like for them to work in partners to practice the skills we learn, but I find that sometimes one person does all the work while the other just copies/listens to the other. This activity was a great way for both people to be actively engaged in the process of practicing skills. – Danielle O’Haren These "sets" are great! I love that there are several options in each pack--single student, partners, and triples! These are favorites with my students and good conversations arise when the answers are not the same. My students are enjoying this activity and I hope to have all of these in my tool box. – E.G. 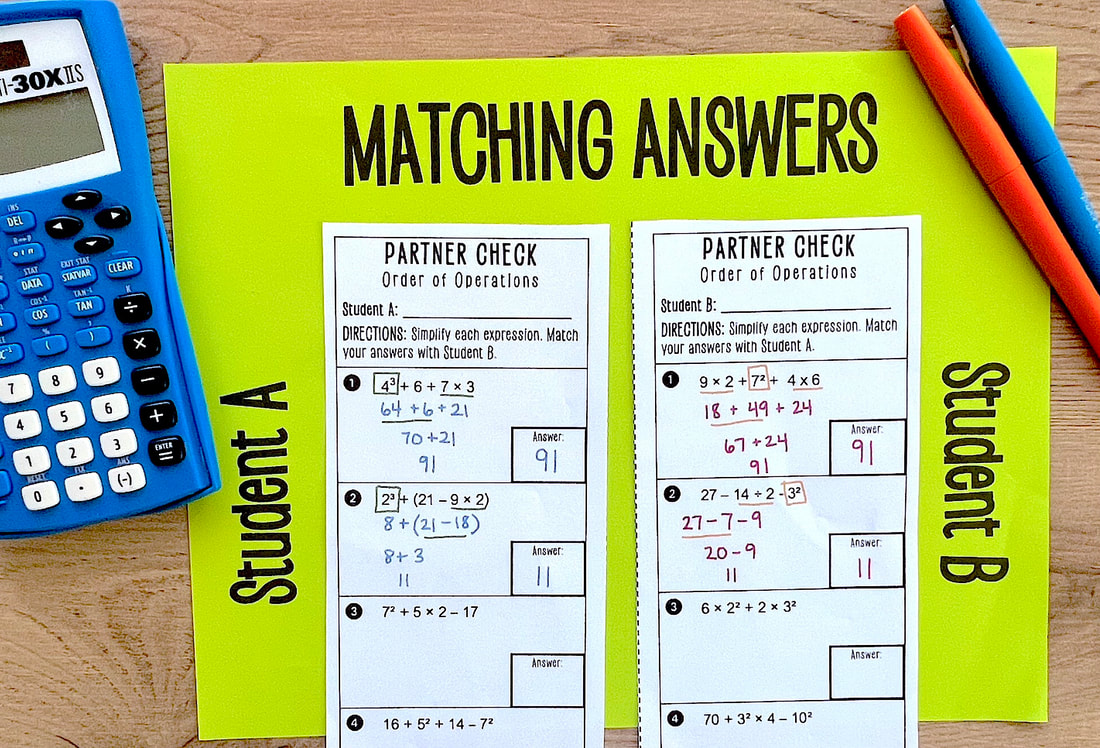 #3 These no-prep, iStep activities are designed similar to iMessage. Each sheet includes a problem to solve and text bubbles for verbal steps and student work. Great activity for partners. Perfect review activity for after an assessment or early finishers! Perfect for improving communication skills and social skills! You can learn more about these activities HERE. 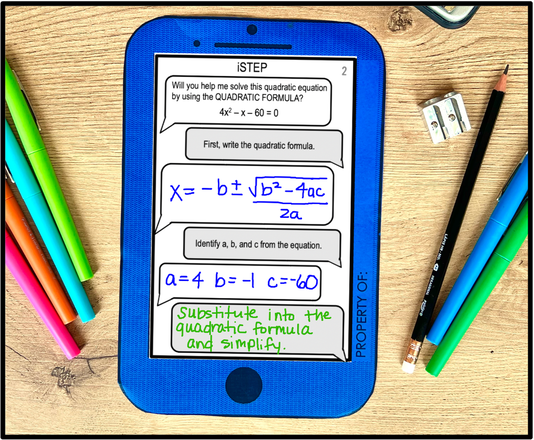 #4 These Mathbook activities are designed similar to Facebook. Each sheet includes space for a student profile picture, name, date, emoji, an “I can” statement, a math problem to solve, and space for the teacher or a peer to put their profile picture and write a positive comment. Perfect for improving communication skills and social skills! You can learn more about these activities HERE. 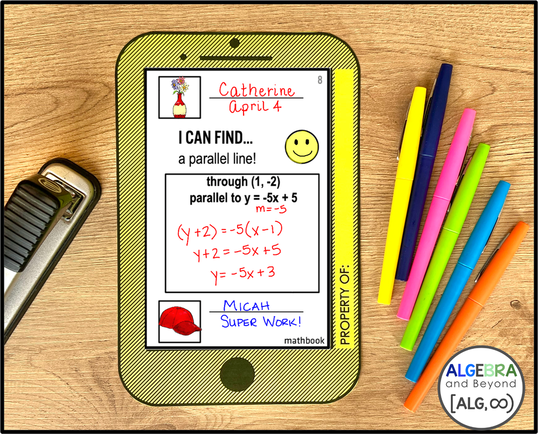 Learn about some other FUN partner activities …
Top 3 Strategies for Effective Partner Work in the Middle School Math Classroom from Lauren Fulton Math Math Partner Games, Spring Puzzles, and End of Year Activities for 3rd, 4th, and 5th from Math Tech Connections 4th and 5th Grade Math Partner Games from Jennifer Findley Speed Dating from Teaching High School Math
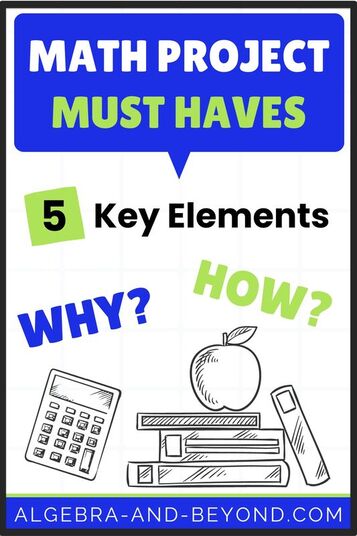
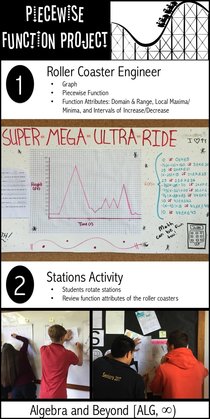
If you’ve visited my website before, you know I’m all about real-world math projects that come straight from my classroom. Today, I’m pulling back the curtain to reveal my process of creating these projects from the beginning to the end. That’s right, I’ll explain my FIVE “must haves” for designing math projects. This blog post is your access to fresh ideas and handy tools, so you can create your own math projects for your classroom! Let the creativity begin…
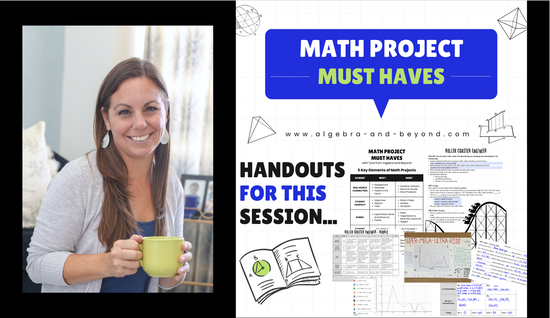
If you want ALL the Math Project Must Have details via video and download the FREE notes and example project, CLICK HERE. 
Real World Connection
Why does this matter? By exploring the common question of “how does math apply to real life?”, we are naturally unlocking student interest. Connecting the math they are learning to everyday situations makes it easier for them to understand and keeps students engaged because it’s relatable. Plus, real-world projects are training for the future. When students create projects that mirror actual situations they might encounter later in life, they are getting a sneak peek into the challenges and problem-solving they’ll face. Student Handout Why do students need this? Knowing the objectives and directions for a math project is like having a roadmap for a journey. It gives students a clear sense of what needs to be done and the knowledge and skills they will demonstrate along the way. Objectives – helps students grasp the purpose of the project Directions – act as a guide, explaining the steps to take to complete the project Alignment – ensures that the project accurately matches your standards A handout not only helps students stay organized, but also keeps them focused on the key aspects and assists them to work more efficiently. Rubric What’s the purpose of this? A rubric breaks the project down into bight-sized pieces, making it easier to understand the expectations and levels of proficiency. It also allows you to weight different aspects of the project by importance. Example You may be wondering if having an example project is really necessary? The answer is a resounding YES! Let me explain why. I was filling in for another teacher and the students were starting a new project. Quite a few of them wished they had an example to look at, so they knew what a finished project would look like. That got me thinking–this visual aid is gold for students, perhaps even more important than the rubric. I’ve always made it a point to include an example project for my students because, let’s face it, student directions and a rubric don’t always paint a full picture. A visual example though? Now that’s the game-changer students need to create an amazing project. Answer Key Let’s face it, answer keys are the holy grail for math teachers for efficiency and making grading student work a breeze. It’s also crucial to be able to check students’ answers as they work through a project. Designing projects that facilitate unique answers for every student is my goal, however, this makes it tricky to create an answer key. I have a few tips on how to easily create answer keys that can be used to quickly type in each student’s unique answer to see if they are correct. 
I’ve revealed my FIVE key elements for creating a quality math project and why they’re game changers. Are you excited to learn HOW you can add all of these elements into your own projects? Mathtastic! I’ve got a FREE video session and downloadable handouts waiting for you, so you can take your projects to the next level! Let’s make learning math a whole lot more exciting!
Don’t have time to make your own math projects? I totally understand, that's why I've got you covered! Check out my favorite real world math projects by clicking on this image:

 Calling all NEW Middle School and High School Math Teachers!!! I have very important advice for you…the best advice I’m ever going to share…ready for it?! YOU CANNOT DO ALL THE THINGS!!! Yes, it’s in caps because I am shouting it! I remember when I was a first-year teacher and I thought I was going to be the best teacher by creating amazing activities, make every lesson “fun”, get to know each student’s strengths and weaknesses to differentiate for each one, integrate real world projects in every unit of study, follow all the new education trends, etc. I learned pretty quickly that there are only so many hours in a day, and even though I’m a high energy person…I am just one person, and I definitely set my expectations way too high. Quite frankly, even veteran teachers can’t do all the things. I’m not saying throw in the towel for trying to do all the things. What I’m saying is, YOU can’t do all the things yourself, nor all at one time. NOT ALL THE THINGS:
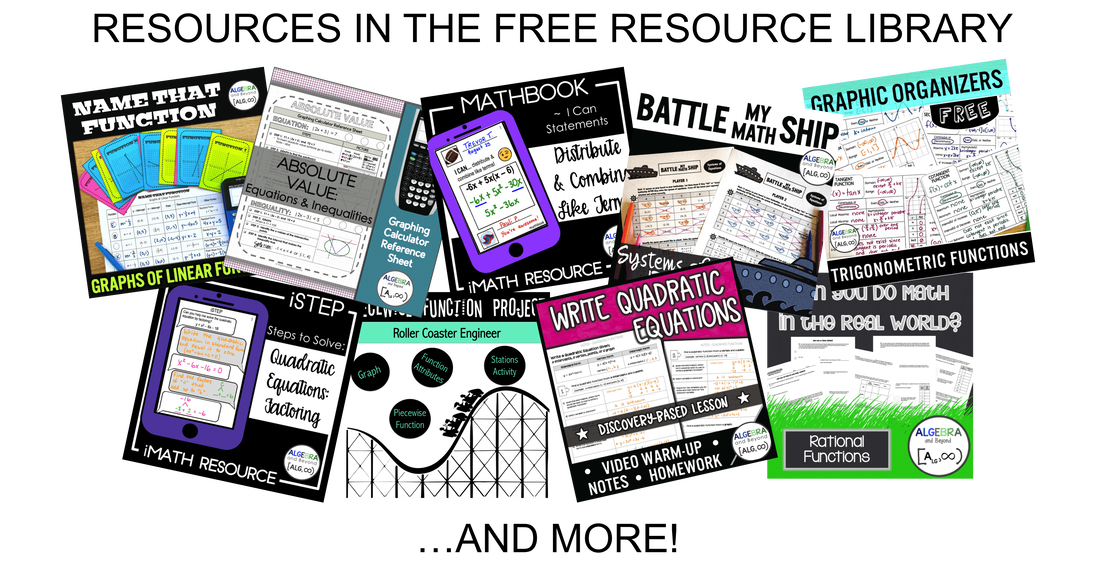
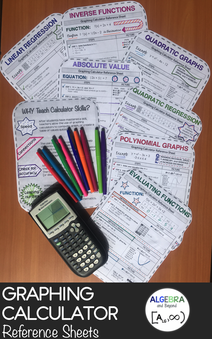
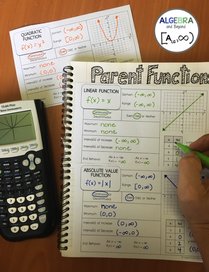
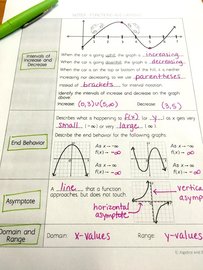
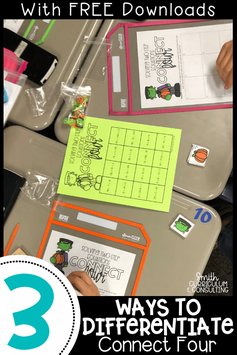
NOT ALL AT ONE TIME: If you are one of those teachers, like myself, that teaches several different grade levels, pick one grade level each year you REALLY want to focus on and improve it. Then, the next year, pick a different grade level. I set up a review cycle of content and implementation goals each year by grade level. It looks something like this: 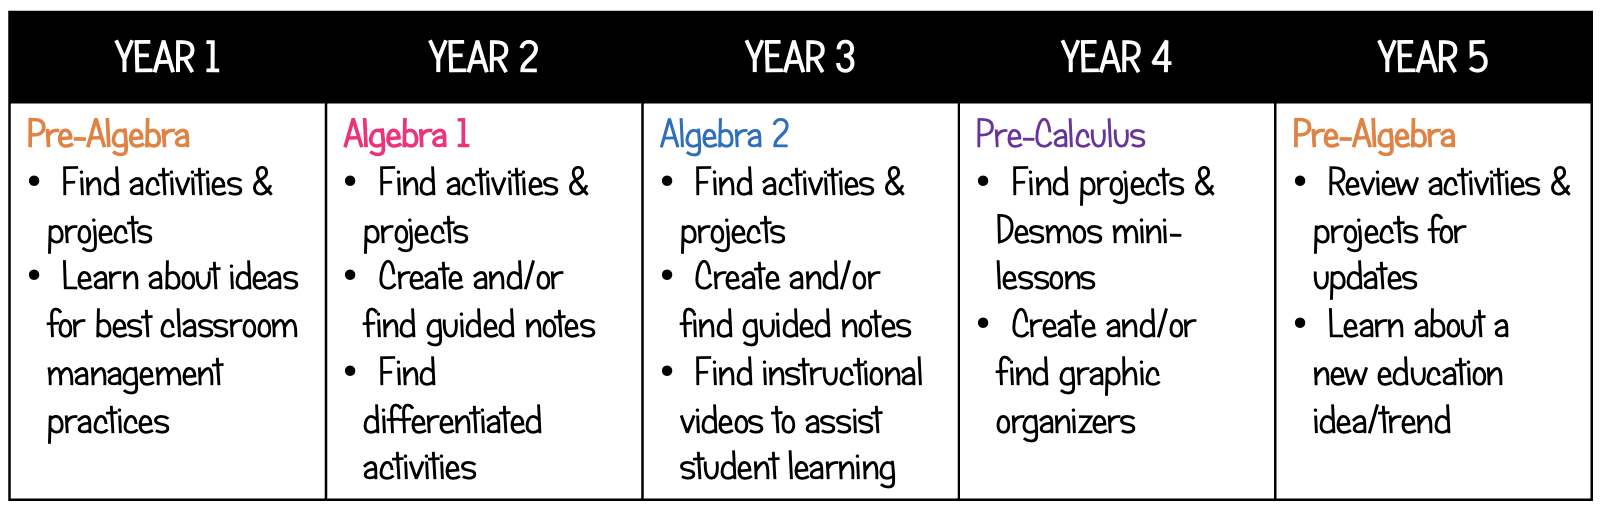 MORAL OF THIS STORY: I’m basically saying this…YOU don’t have to know or do everything yourself, and you absolutely cannot implement it all at one time. Learn from those of us that have been around awhile, and definitely don’t re-invent the wheel. So many amazing ideas and activities are at your finger tips, thanks to the internet. And don't forget to come up with a system for improvements year after year, like my review cycle idea. A little at a time, done well, goes a long way! So, where can you start?FUN ACTIVITIES – get started by using activities from my FREE resource library and my TpT store by clicking on the images below. You can also use our best friends, Google Search and Pinterest to find activities based on each math concept.
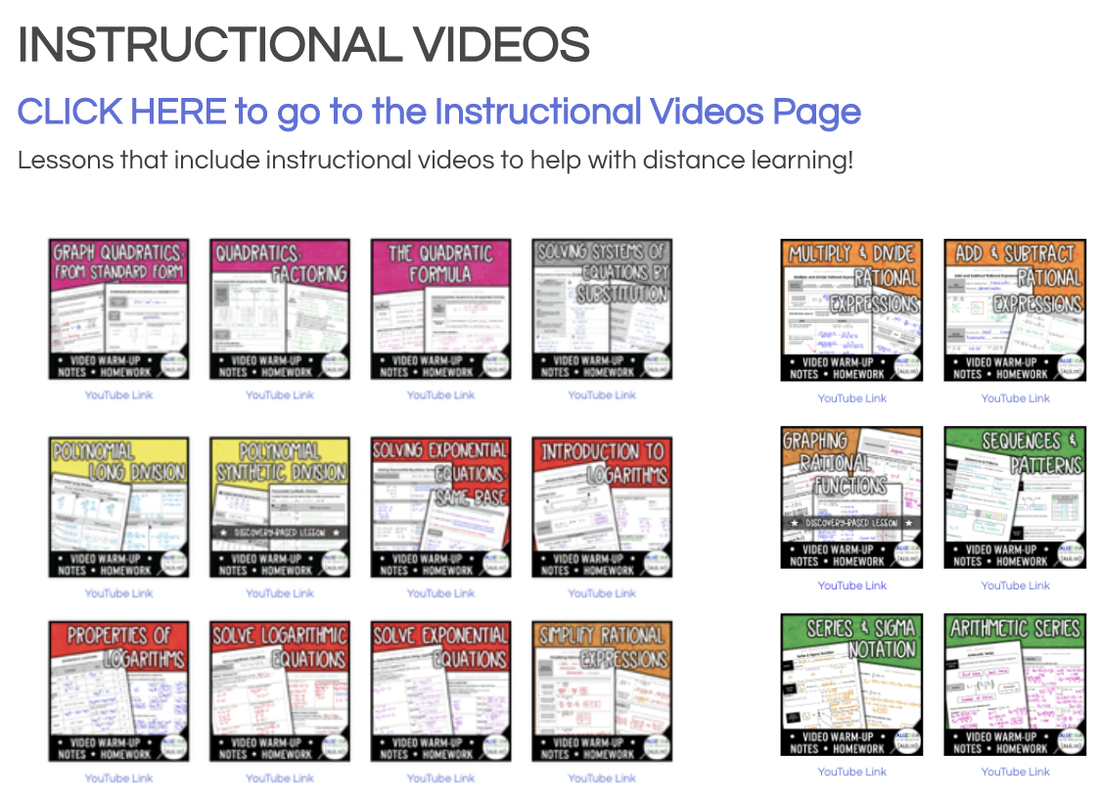
REAL WORLD PROJECTS & MINI-LESSONS – Desmos Classroom Activities & you can find more in-depth projects in my store.  INSTRUCTIONAL VIDEOS – I’ve created a few instructional videos and have several YouTube channels that I love to use with my students. Click on the images below.
LEARN FROM OTHERS You can find several tips on my BLOG. I’ve also asked some of my math friends to share their best tips…so here they are:
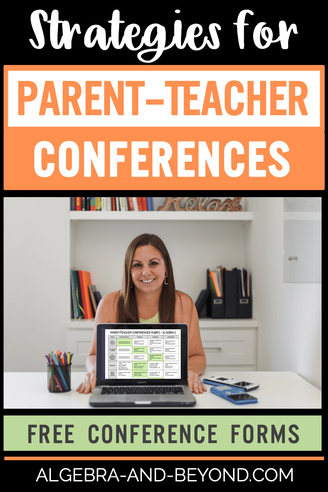 I want to preface this post with the fact that there isn’t a one-size-fits-all strategy for how to conduct parent-teacher conferences. There are MANY ideas and methodologies that have been used by all levels of teachers. It is important to choose the best method that works for YOU. I’d like to share a strategy that worked for me and can be used to help you set up your parent-teacher conferences. I have included two FREE templates for you to use to prepare for parent-teacher conferences. Begin by using the SET IT UP template to decide WHAT you want to achieve during the conference and HOW you want to achieve it. This handout can be used digitally by typing in your content or if you are a paper/pencil person, you can print and complete it that way.  CREATE A GOALDecide the important topics you want to share and/or discuss during the conference. Let’s face it, you simply cannot cover everything you want to during the conference. My conferences were always set for 15 minutes, so I had to pick and choose 3-5 areas I wanted to discuss to give the parent/guardian a good picture of their child’s progress. CHOOSE A METHODI find having some kind of form filled out prior to the conference helps keep the meeting focused. I prefer a RUBRIC in which I fill out for each student that includes the level of understanding for the units of study for the semester, work ethic, attitude towards learning, and attention. This has been by far the best thing I’ve done for having successful parent-teacher conferences! I usually print the rubric and highlight each area, so parents/students can leave with a hard copy. But, you can also share each rubric with them virtually by sharing your screen and/or via email. Click on the image for an editable version of this rubric. 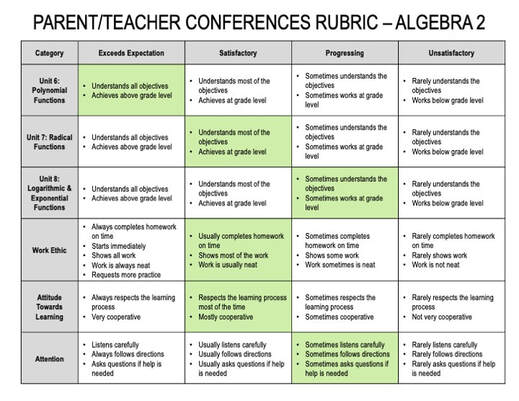 ATTENDANCEI used to only meet with the parent/guardian, but one year I changed it so that the student had the option to attend. I found that students enjoyed hearing about their progress and the good things they were doing in class. It was also helpful for them to be part of the honest conversation on areas they could improve. I truly think who attends varies on each teacher’s situation, so again, do what is best for YOU. EXECUTE YOUR PLANWhat needs to be prepared in advance? For me, I filled out a rubric for each student and made a checklist of appointments to keep the meetings efficient and on time. During the conference, I explain each area of the rubric and give a few examples. Parents were also happy to walk away with something they could reflect on with their child. REFLECTIONSI am the type of person that always wants to improve! I am constantly analyzing lessons, projects, activities, etc., so of course I want to reflect on how I set up and execute my conferences to make them even better the next time. Using the SET IT UP document helps me plan for conferences each year and having a RUBRIC I can edit for each quarter/semester helps me make the necessary adjustments for each conference. Here are some other strategies my fellow mathtastic friends have used with their students:
TEAM APPROACH by Math Giraffe Work together as a team to prepare for each conference. Students do self-evaluations that they present to parents alongside the teaching team's evaluation. Homeroom teachers act as representatives of the entire teaching team, while students take accountability and share input about any discrepancies / similarities between the two forms. (free download included) 
We hope you find these
parent-conference strategies helpful! |

Hello there,
|


 RSS Feed